
CA - Animation Systems Studio 1
Systems Studio is the 3D creation course for Computer Animation. Students go from little to no knowledge of CG to modelling and rigging their own characters. Below is a cross-section of some of the material I've developed over the years. Students develop their skills as 3D artists through a series of iterative exercises that rapidly expand in complexity.
A large portion of my time at Sheridan involved the continued enhancements of the Animation Systems Studio courses. Systems Studio was always a generalist course, a “Jack of all Trades”. It had everything: modelling, lighting, texturing, and rigging. As of this school year (2021-2022), Systems Studio 1 and 2 no longer exist. They've been split into specialized components that will give students more time to explore the various concepts. Although Systems Studio is no more, below are some of the assignments I had developed over the years.

W.E.R. Sculpture (WER)
The first two weeks of the school year focus primarily on Maya: file management, and basic modelling theory. As an icebreaker I developed a simple but creative exercise to create a sculpture using only primitive objects (cube, sphere, plane, etc) and the transformation tools Translate (W), Rotate (E), and Scale (R)…thus the name, the W.E.R. Sculpture. From these basic shapes, students create more complex structures by using Maya’s duplicate feature in addition to moving objects around in 3D space. Preset attributes (gold, silver, glass, etc) on Redshift materials are used as a way of introducing the students to making connections between geometry and shaders.
This is my demonstration example from the first class this was implemented.

Found Object Sculpture (FOS)
The first assignment the students’ work on is the Found Objects Sculpture (FOS), where they have to build an animal of their choosing from a minimum of 5 repeating parts. Students begin by designing a mood board that includes angles of their animal, and sourced images of the various hard surface parts they’ll need to construct.
I decided to go with a mountain goat as my example. We focused on building the objects with the poly flow in mind so that they can be smoothed at render time. This is the final result of the example I worked on while demonstrating the various tools and processes.

The initial concept design with references of the different components I was going to model.

The first component to be modeled was a small carbon fiber clip. This was a great intro to some of Maya’s modeling tools.

An aspect of the assignment was to have objects that ranged across 3 levels of complexity.
Interstitial Modelling

Interstitial Model (IMO)
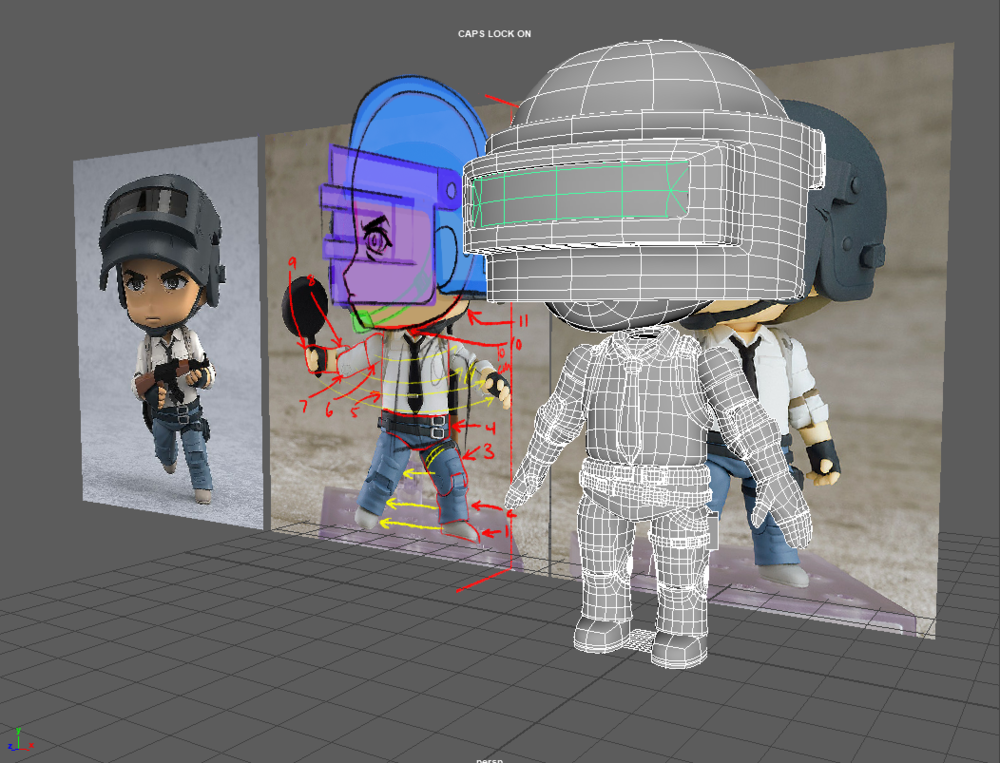
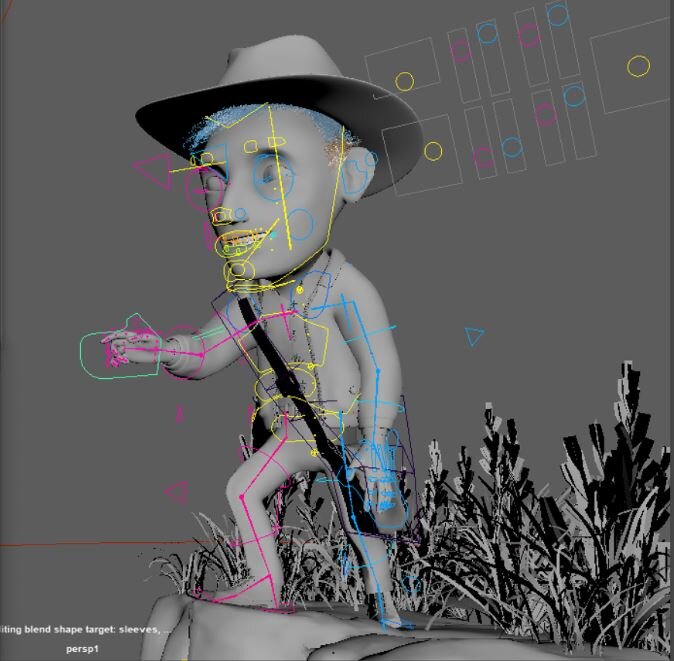
The interstitial assignment has been a staple of Computer animation and had started well before I joined Sheridan almost two decades ago. This project continues with the hard surface modelling tools in Maya. We look at approaches for building toys from existing models. The toys the students develop will be used as the main character in their first short film, a 10-second interstitial. For my last demonstration, I used the Nendoroid Lone Survivor character from the video game PUBG (Nendoroid The Lone Survivor (goodsmile.info))
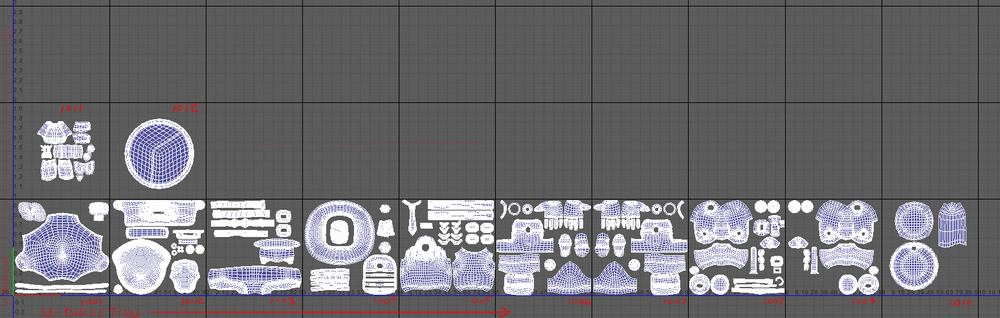
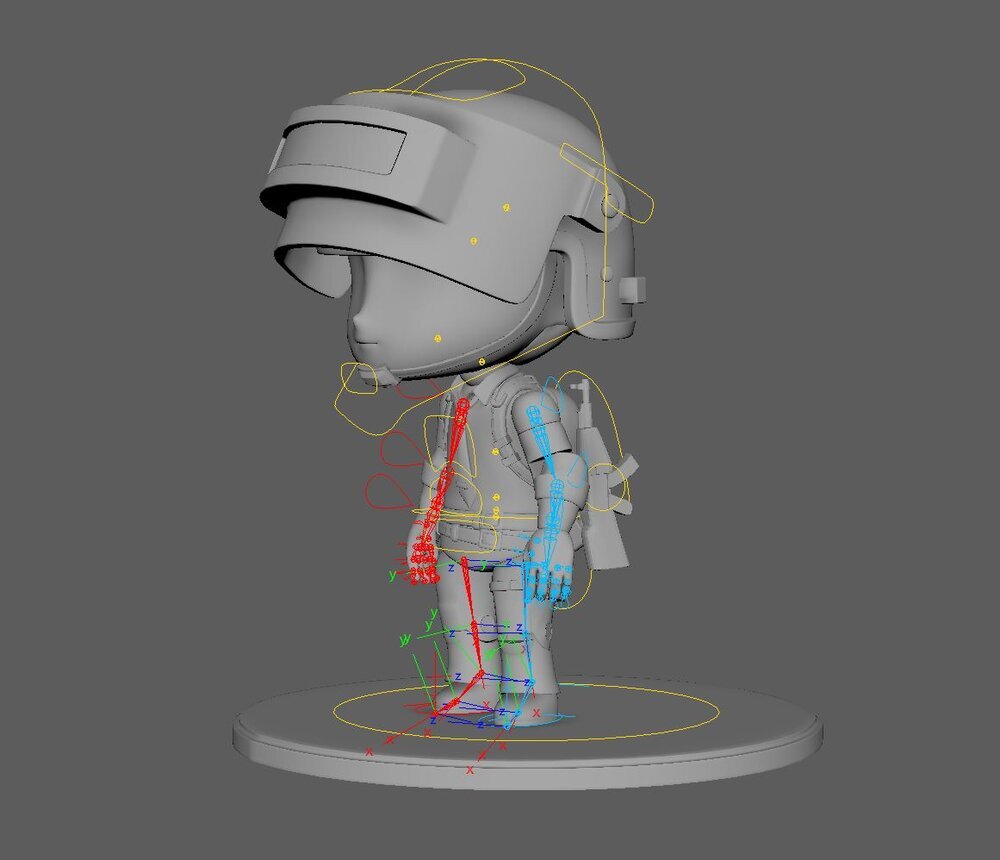
This shows the image planes used to get proper proportions when modelling the character. This little guy ended up using 1 UDIMs. After the model is finished the UVs are laid out (in this case using UDIMs), and the model is then brought into Substance Painter for texturing. This Nendoroid - Lone Survivor toy was the figure I used to show the modelling process. This ended with an introduction to rigging. This is an image of the final posed character.


An example of some spur-of-the-moment solutions to help students through a particularly challenging problem.
Bespoke Solutions
A large part of systems is to develop unique solutions for the students. Every student is choosing a different object to model and rig. These characters all need to be able to achieve a variety of movements to meet the performance requirements of the story.
Substance Painter Workshop
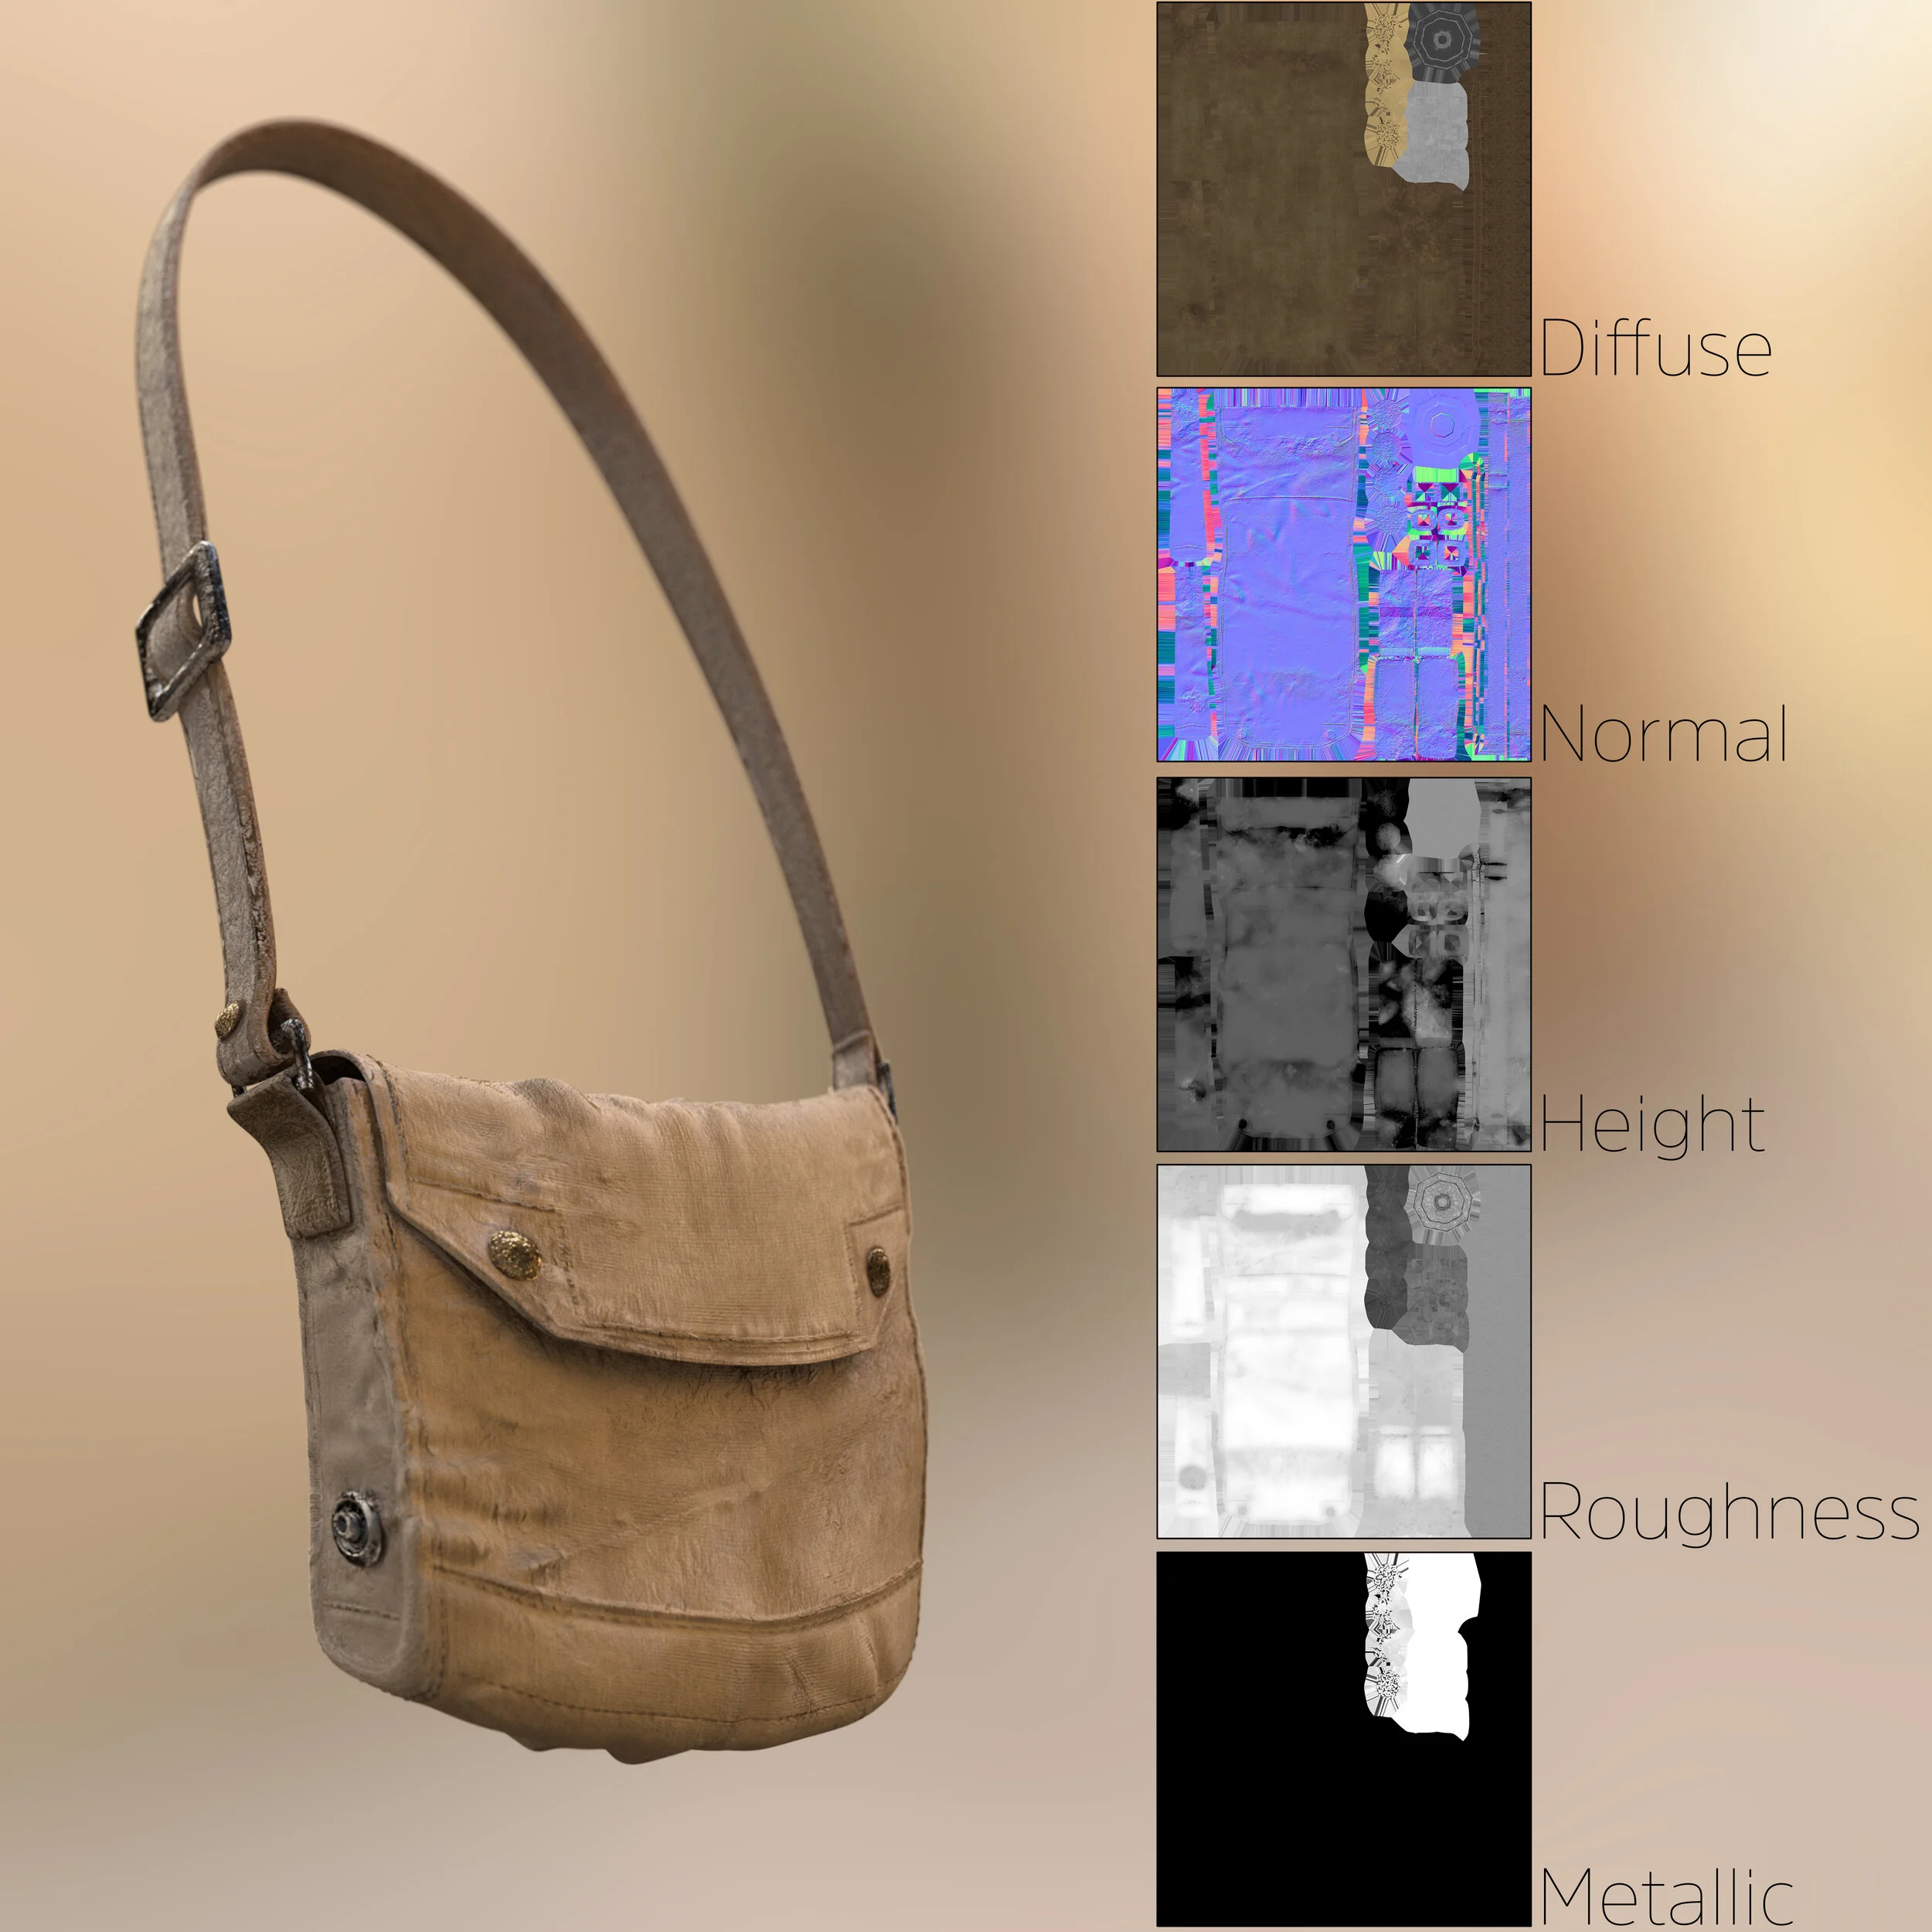
I have integrated Substance Painter into the overall Animation Systems Studio 1 curriculum as of last year (2019-2020) where I covered it as part of the IMO development. Before last year, I would give extracurricular workshops on how Painter could be harnessed to greatly embellish props, sets, and characters at a fraction of the time it previously took. The vast library of editable materials makes it relatively easy to texture a vast amount of geometry. I also introduced UDIMs, which is an industry-standard for organizing UV tiles. This allows multiple objects, with all their various attributes (roughness, subsurface scatter, metallic, normals, displacements) to be controlled through a single shader.

This little guy was from a Zbrush - Substance - Maya demonstration I had given to a different intake.

The stylized tank was a simple model I used to demonstrate how even basic geometry can look more complex than it is once it’s embellished.

And the final render in Maya with all the of the various maps connected (including displacement).

Digital Sculpt (DSC)
After the interstitial, we switch gears and begin modelling organic objects. We use Zbrush (which is industry standard) for this module. In Zbrush, we explore the various brushes and workflows.
Nosferatu (Vampirus Tracksuiticus)
Tracksuit Nosferatu was a stylized concept I came up with about a week and a half ago on my train ride into work. I used the design to demonstrate some of the basic Zbrush tools for my Computer Animation class. The final texturing was done in Substance Painter and rendered with Redshift.


Character Development
Typically, I’ll develop an original character from beginning to end. Taking the students through the character development process ties together design and functionality. Part of this process is to highlight where loops should be placed to avoid poor deformations once the character is rigged.
This particular character (to the left), was developed during the year I was completing my Masters of Digital Media (https://www.kristian-howald.com/masters ) at Ryerson.


Rigging
In Class Rigging (ICR)
The current Sheridan rig is something I’ve been developing over the years. In 2015, I moved away from a constraint-based approach to a more robust, hierarchy-based system. The result is a modular, scalable rig adaptable to a wide range of projects.
The character on the left shows AutoRig 1.0, an early teaching version I built to walk students through the rig step-by-step while still producing a consistent final result once the rig is activated.
In class, I demonstrate rigging using whichever character I’m currently building. Students go through the full process twice: first as an in-class rigging assignment where they follow along with the demonstration, and again when they rig their capstone character.
Animation Systems Studio 2
Systems Studio 2 is a combination of lectures and studio time to develop and complete the Capstone film. The first half of the semester completes the character with the addition of a robust face rig. There are some additional workshops on how to enhance a character through dynamic elements such as nCloth, Xgen Hair, and Dynamic Curves.
The majority of this semester is helping students out with more project-specific questions. The video playing behind here highlights some of the solutions I’ve created.
Whatever it is, the way you tell your story online can make all the difference.
The Face Rig
The face rig is a hybrid of a setup we’ve been using for a while now and Josh Sobel’s face rigging system. I had been moving to a joint-based system almost 10 years ago, however, I discovered Josh’s workflow and realized it worked perfectly with the body rig I had developed.
The face setup and finalizing of the overall rig takes the first 5 weeks of the second semester. Once this is completed we focus on character-specific dynamics. This would include using dynamic curves to control elements like stylized hair, ears, or tails. The remainder of the time is spent with the students, helping them through the process of completing their capstone film.